Most people look at their first guitar as just a purchase, but it’s actually the first piece of your new identity. The biggest frustration I’ve seen over the last four decades isn’t a lack of talent, it’s the friction caused by the wrong gear.
When you have a guitar that won’t stay in tune or an amp that sounds like a tin can, your brain starts to predict that playing is “hard” and “unpleasant.” Before you know it, that guitar is in the closet, and the dream of playing is dead.
I started this journey at 15 with a guitar that was more of a struggle than an instrument. I’ve spent the last 40 years looking for that “sweet spot”, where affordability meets playability. You don’t need a $3,000 setup to sound like a rockstar, but you do need a rig that feels familiar and responsive from the moment you pick it up.
In this guide, I’m stripping away the marketing fluff and the spec-sheet overload(there will be a few spec sheets). We’re going to build a setup that removes the technical barriers and lets you focus on the only thing that actually matters: the sound in your head and the feeling of the strings vibrating under your fingers.
Whether you’re looking for that classic Telecaster bite or the thick resonance of a hollow-body, this is your roadmap to a rig that doesn’t just look the part, but actually helps YOU play it.
Prioritize Playability over Price: A professional setup, including nut filing and truss rod adjustment, is the single most important factor for a beginner’s success, regardless of the guitar’s cost.
Match Anatomy to Intention: Choose your components strategically. Humbuckers offer high-output rock power without noise, while scale length determines string tension and how “easy” the guitar is to play.
The Psychology of Gear is Real: The “Hero Factor” matters. Your brain is a prediction machine; choosing a guitar that triggers your “Inner Rockstar” reduces practice friction and builds strong, consistent habits.
Master Your Signal Chain: Understanding the journey from your pick to the speaker allows you to build a system of quality. A veteran’s secret is to prioritize a simple, high-quality rig over complex pedal setups.
Maintenance Is Not Optional: A dedicated “Gear Kit” with essential tools, conditioners, and an accurate tuner ensures minor maintenance issues never become reasons to quit.

In my 40 years of playing, I’ve realized that a beginner’s first guitar has one job: it must stay out of your way. If you are fighting a neck that is too thick or strings that won’t stay in tune, your brain will subconsciously tell you that playing is a chore.
To “unleash your inner rockstar,” you need gear that feels like an extension of your body.
For rock, I generally categorize the electric guitars into 3 distinct vibes:
| Sound Profile | Best For… | Recommended Model | Why It Wins (Veteran Insight) |
|---|---|---|---|
| Modern & High-Gain | Versatility, Metal, Modern Rock | PRS SE Studio | Exceptional build quality that stays in tune under heavy playing; it grows with you. |
| Twang & Grit | Classic Rock, Punk, Country | Squier Debut Tele | Rugged, simple design that is easy to maintain and has that iconic "bite." |
| Warm & Woody | Blues-Rock, Jazz-Rock, Indie | Ibanez Artcore | Offers a sophisticated, resonant tone and a professional feel that inspires creativity. |
| Classic Humbucker | Hard Rock, Heavy Blues | Epiphone Les Paul | The gold standard for thick, sustaining rock tones and iconic "stadium" looks. |
Most beginners fall into the “Tone Trap”, thinking they need a massive stack to sound “rock.” The reality? Your brain needs to hear a clear, inspiring tone even at bedroom volumes to stay motivated. Read my Tube Amps vs. Modeling Amps Review for a better understanding of what gear fits your style of playing.
Look for a digital modeling amp or a small tube amp that offers a dedicated “Gain” or “Overdrive” channel. The goal is to find a sound that makes you want to play just one more riff. Check out my reviews on the Best Portable Guitar Amps for Rock Under $300 and the Boss Katana 50 vs Fender Mustang LT50.
This is what most guides skip. You can have a $2,000 guitar, but it will sound like a toy if you use a $5 cable that leaks interference.
When you look at a guitar, you’re looking at a series of engineering choices. For a beginner, these choices determine whether you’ll be playing riffs by next month or listing the guitar on Facebook Marketplace.
There is an endless debate in guitar forums about “tone woods.” After 40 years of playing, here is my take: While mahogany offers a darker resonance and maple provides a brighter “snap,” the most important factor for a beginner is weight and balance.
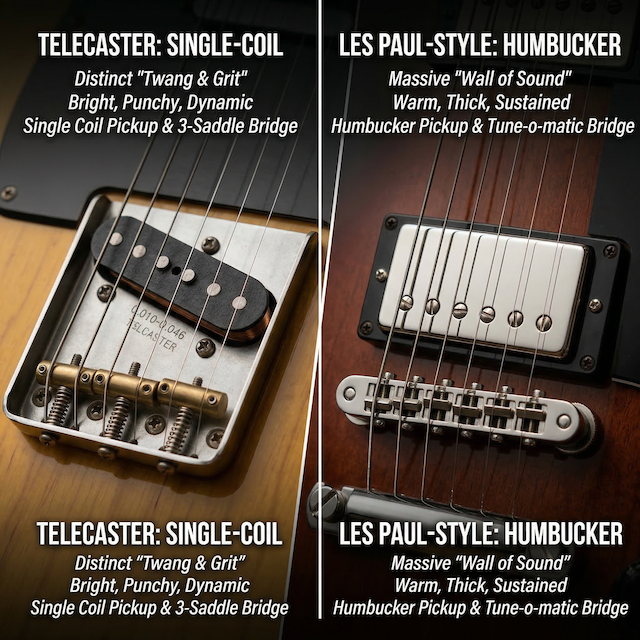
This is the most critical anatomical choice you will make.
Read more about Humbucker vs. Single Coils here.
The bridge holds the strings to the body. For beginners, I almost always recommend a Fixed Bridge (or “Hardtail”).
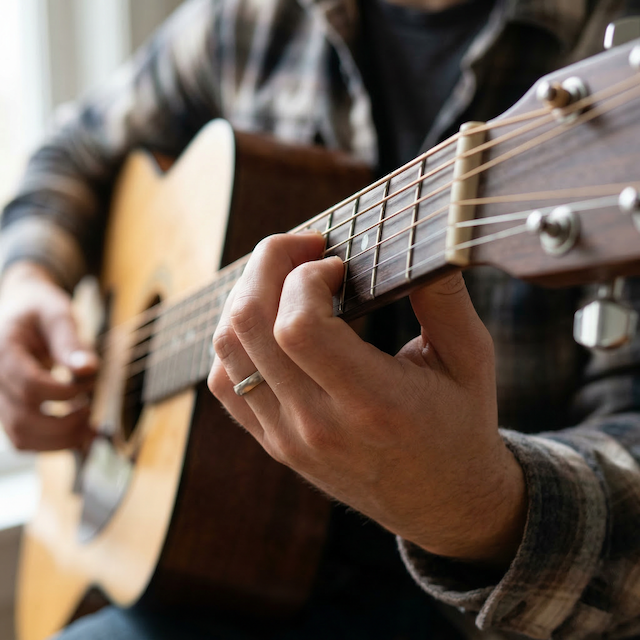
This is the “invisible” part of gear. You can’t see “feel” in a photo, but your fretting hand knows it instantly.
The “profile” is the shape of the back of the neck.
| Neck Profile | Key Differences | Feel | Common Models / Where You’ll Find It |
|---|---|---|---|
| C-Shape (Oval Profile) | Rounded “oval” neck shape that works for most hand sizes and styles. | Comfortable, rounded, and versatile. | Fender Player Stratocaster, most standard modern guitars, Gibson “’60s slim taper” models. |
| U-Shape (Rounded “Baseball Bat”) | Thicker neck with more mass; fills the palm more than a C-shape. | Thick, substantial, and rounded. | Vintage 1950s Telecasters, Fender ’52 Telecaster reissues, Gretsch guitars. |
| D-Shape (Flat-Backed) | Flatter back with broader “shoulders” along the edges. | Thinner, flatter back, and wider shoulder. | Modern shredder guitars (Ibanez, ESP, Suhr), 1960s Gibson Les Pauls. |
| Wizard (Ibanez-style Thin / Flat) | Extra-thin, fast neck profile commonly associated with shred-focused guitars (often closer to a very slim D-style feel). | Very thin and fast, flatter back feel; built for speed and low effort fretting. |
Ibanez RG Series: RG550, RG560, RG570, and many modern RG models. Ibanez Prestige & J. Custom: high-end Wizard HP (High Performance) necks. Ibanez S Series: S520, S521 (Wizard III). Ibanez Artist/Signature: often used by shredders like Steve Vai, Joe Satriani, and Paul Gilbert. Similar thin/flat necks on other brands: Jackson (especially Japanese models from the 80s/90s), Charvel, and ESP/LTD. |
Scale length is the distance between the “nut” (at the headstock) and the “bridge.”
This is where my philosophy on the brain comes into play. Your brain is a Prediction Machine. If you pick up a guitar that looks like a cheap toy, your brain predicts a “cheap” experience.
There is a psychological phenomenon where having a guitar that looks like your hero’s (whether it’s Page’s Les Paul or Van Halen’s striped beast) actually triggers a dopamine response.
In my 4 decades of playing, I’ve seen more beginners quit because of a “bad guitar” than a “lack of talent.” Usually, that “bad guitar” just needed 45 minutes of professional attention.
When you take your guitar to a tech (or learn to do it yourself), here is what actually happens:
The Veteran’s Tip: Don’t trust the “Factory Setup.” Even a $1,000 guitar can arrive with a neck that moved during shipping from a humid warehouse to your front door. Budget for a setup immediately.
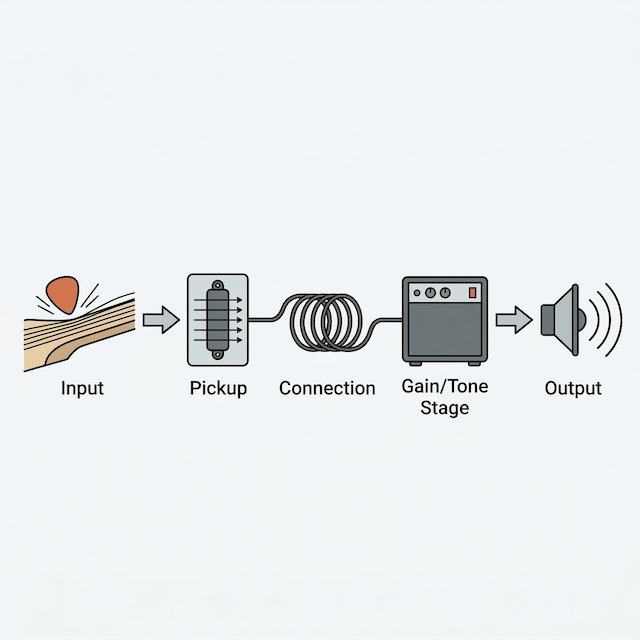
Understanding how your sound travels is the first step toward “Mastering Tone.” Most beginners just plug in and hope for the best. Instead, you need to understand the Signal Chain.
Many beginners think they need pedals (distortion, delay, chorus) to sound good. Wait. The secret is that the best tone comes from a solid guitar and a decent amp. Learn to find your sound with just those two “Lead Characters” before you start adding “Supporting Actors” like pedals, okay?
We’ve covered the anatomy, the feel, the psychology, and the maintenance. Now, you need to execute.
If you are just starting, your “Mission Statement” is simple:
Now that you have the gear, here is exactly how to start playing your first rock riffs.
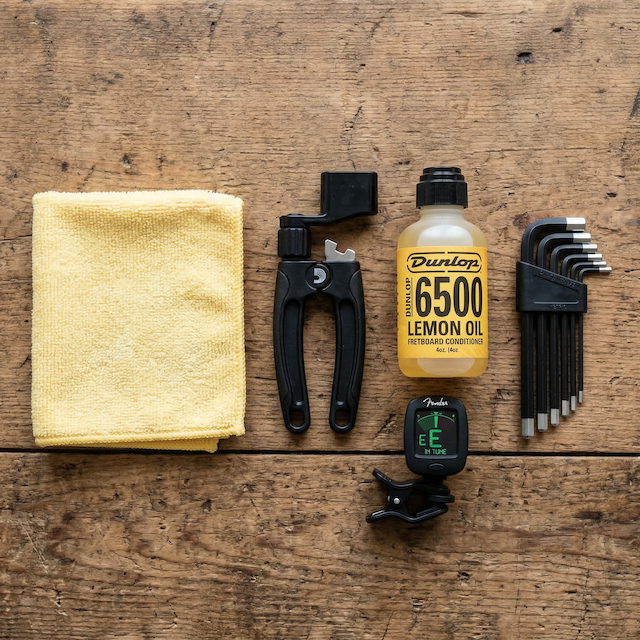
Owning a guitar is like owning a classic car, you can’t just drive it, you have to maintain it. If you wait until a string breaks or the fretboard looks like a parched desert to take action, you’re already behind.
To keep your gear running smoothly, you need a small kit of essentials. Having these on hand ensures that a minor technical issue never becomes a reason to skip a practice session.
For a deeper dive into everything you need in your gig bag, check out my full gear checklist.
Always keep an extra set of strings and at least three picks in your guitar case. There is nothing that kills the “inner rockstar” vibe faster than having the house to yourself, sitting down to play, and snapping a string with no backup in sight.
Building your first professional rock rig isn’t about vanity, it’s about removing the obstacles between your heart and the amplifier. By choosing the right Anatomy, prioritizing the Feel, and respecting the Maintenance, you are giving yourself the best possible chance at success.
Remember, the gear is the “Lead Character” of your setup, but YOU are the director. Now that you have the tools, it’s time to make some noise!
Yes. Budget guitars are manufactured quickly. A setup optimizes the string height (action) and intonation, which makes the guitar infinitely easier to play and is essential for preventing finger fatigue.
Single-coils (like on a Telecaster) have a bright, snappy tone ideal for classic rock and indie, but they can hum. Humbuckers are thicker, darker, and designed to cancel electrical interference, making them essential for high-gain rock and metal. (Humbucker vs. Single Coil Review)
Absolutely. A longer scale (e.g. 25.5″) increases string tension, making chords feel “snappier.” A shorter scale (e.g. 24.75″) reduces tension, making the strings feel looser and significantly easier for beginners to bend.
Beyond a tuner, the most important item is a quality microfiber cloth. Wiping down your strings and fretboard after every session removes corrosive sweat and oils, extending string life and protecting the finish.
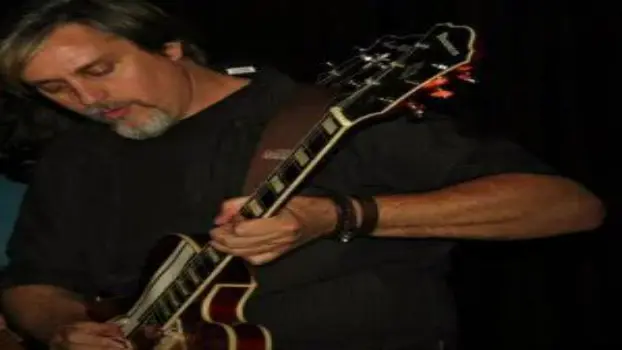
I’ve been playing guitar 40 years now; writing, recording, and rocking in bands. Randy Rhoads, Warren DiMartini, and of course, Jimi Hendrix all lit the fire for me, and I’ve been chasing that passion ever since.


